Making an acrylic wall calendar has been on my to do list for quite some time now. Whether you're trying to make the most of a small space by using functional wall décor, or you are revamping your home office, an acrylic wall calendar will give your space a nice, put together look.
It is a fun modern take on traditional erasable calendars and is a great way to cut back on disposable waste! Plus, while you can purchase one of these pre-made, it costs about half the price to DIY it, which is great for a refresh on a budget.
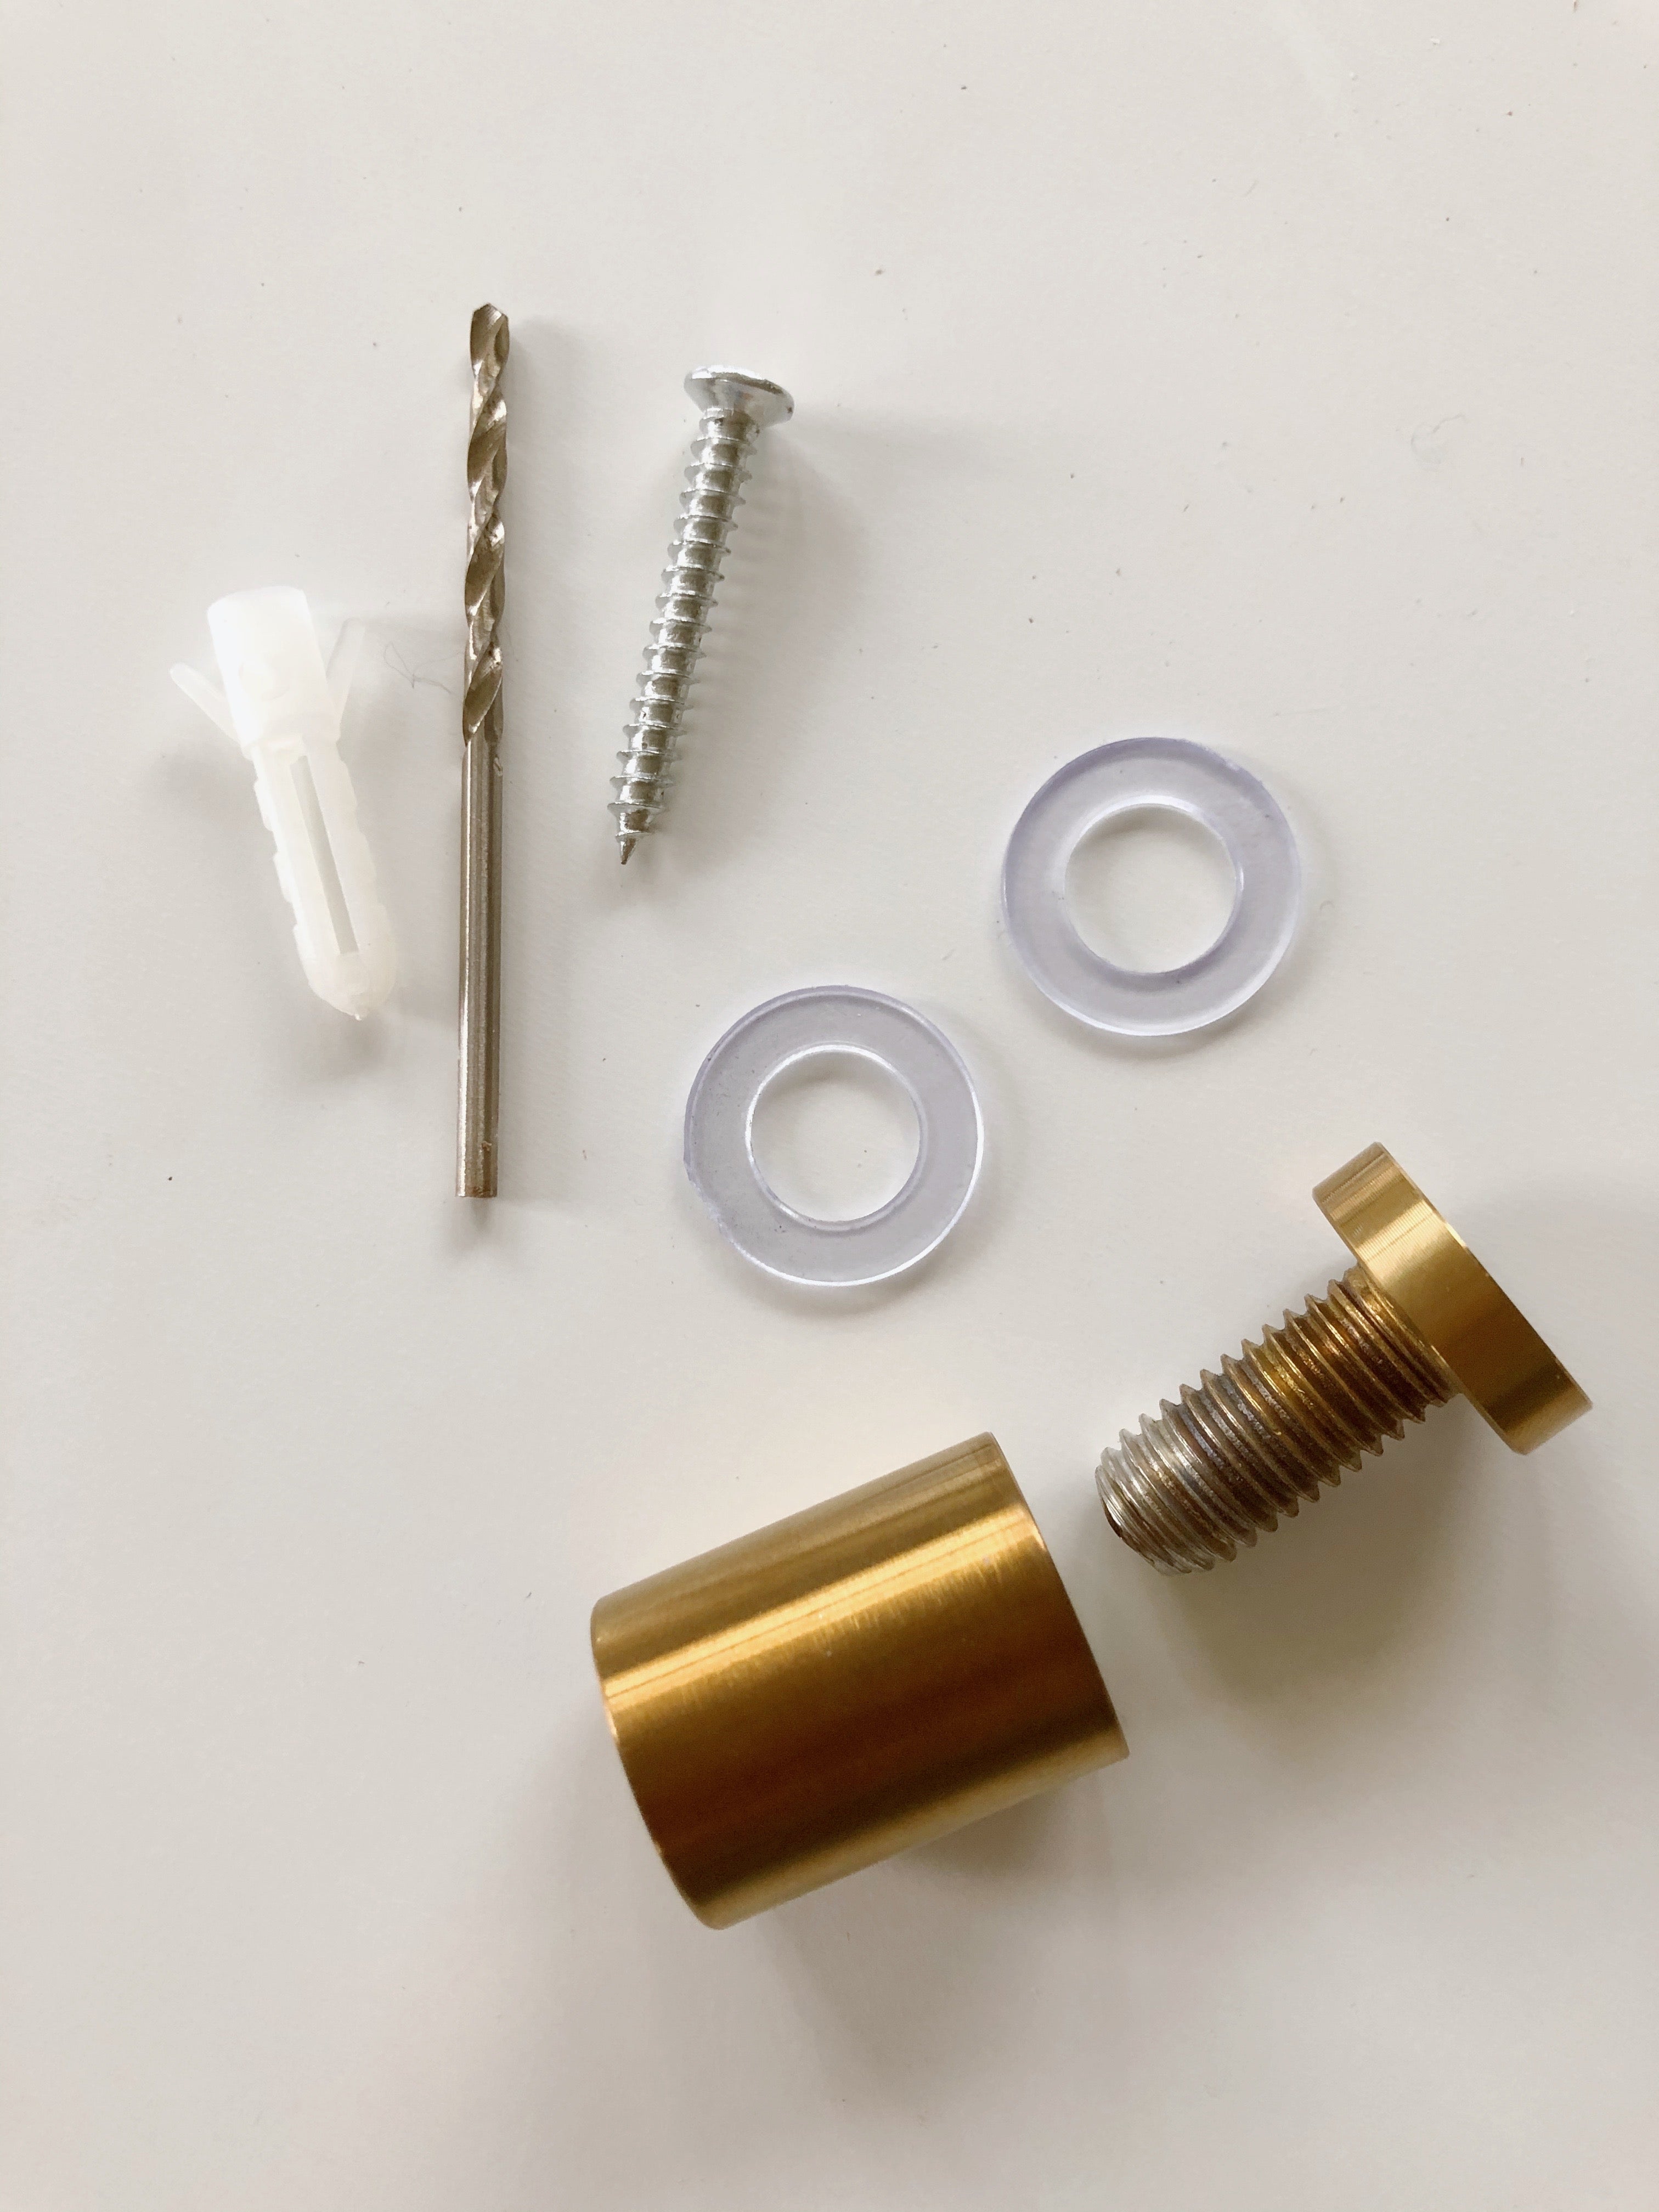
Supplies You Need

*These are the main items I picked up for this project. The other items I had on hand.
Materials
- Acrylic plexiglass sheet (I used this one)
- Stand off screws (I used these is brass, they come with screws and drywall anchors for hanging)
- Vinyl decal (If you have a Cricut you could make your own, otherwise I recommend this Etsy shop)
- Dry erase marker or chalk marker
- Painters Tape
- Scrap wood
A quick note on the plexiglass- most big box hardware stores will carry it. From my own research, I purchased from Home Depot because they had a better size selection (the exact size I needed). While Lowe's does not carry as many common size sheets, they are actually set up to cut the plexiglass for you in store so that would be the best place to go for a custom size sheet.
I also highly recommend that you either keep a scrap piece on hand, or purchase a smaller, inexpensive sheet to practice drilling into before making holes in your project sheet.
Tools
- Power drill
- 1/2" drill bit
- 1/8" drill bit
- Ruler
- Leveler
- Screw driver
- Scissors
How To Make A Stylish DIY Acrylic Calendar
I will admit after seeing a friend use an acrylic sheet to create a floating picture frame, I thought drilling into the plexiglass sheet would be a little bit easier than it was. With some practice I got a feel for it though and it's not hard. I learned a lot while doing this project, and I will be sharing where I messed up so that you can avoid the same mistakes. This is a fairly easy DIY that anyone can do.
Step 1: Tape Plexiglass Corners
You may have noticed that your acrylic sheet came with a frosted protective covering on each side. Be sure to leave it on throughout this entire process to keep it clean and avoid any scratches.
The first thing you are going to do is tape the corners of your acrylic sheet. The tape will help prevent the sheet from cracking. I found drilling holes worked best when I put a few layers of tape on in the same spot versus one later of tape. Make sure that the tape wraps from the front of the sheet all the way around the back side.
Step 2: Mark Holes
For your acrylic wall calendar to have a uniform look, you want the hardware to be placed in the same spot on each corner. I recommend placing them 1-1.5 inches in. You can do this by creating a square to use as a template or just using a ruler to measure and mark each corner. You will want to mark holes on all four corners, on both sides of your acrylic calendar.

Step 3: Drill Holes in Acrylic
As I stated earlier, I cannot stress enough how important it is to attempt this on a scrap acrylic before you start on your actual acrylic calendar. I did not practice ahead of time, and I ended up cracking my sheet on the first hole I made. I had to buy another sheet for my project. After cracking my first sheet I started using it for practice and made four holes without any cracking before I started on my new sheet.

My first attempt
Secret To Drilling Successfully
The key to drilling holes successfully is to go at a slow, steady pace and to not use too much pressure. If you drill too quickly and apply too much pressure, you will be more likely to end up with cracks. If you drill too slow you will not have enough momentum to melt the acrylic.
Important Things To Remember
Before drilling, be sure that you have a piece of scrap wood under where you are drilling so that you do not damage your work surface. I used a couple of pieces of scrap 2x4, one block on each end so that the acrylic sheet remained level while I worked.
The side you start your drilling on will be the FRONT of your acrylic wall calendar.

How To Start
To start drilling place your drill bit on the dot you marked on your tape. Make sure that your drill is straight up and down, not tilted. Apply a gentle but firm amount of pressure and slowly pull your drills trigger. You will notice white plastic shavings beginning to pile up around where you are drilling. This means it's working!
Keep going until you start to feel some resistance. At that point lift your bit up and check to see if you have broken through the sheet. If you have, this is the time to flip your acrylic sheet over and finish drilling from the back. If you try to force your bit to keep going from the front after you start feeling resistance you will cause it to crack. A little resistance is okay, but if it feels like your bit is stuck and does not want to turn, DO NOT continue trying to drill.

* This is what my hole looked like when I started feeling resistance and flipped it over.
How To Finish
From the back side you will want to drill even slower than you did from the front and very little pressure is needed. The area will already be very thin. It honestly felt like I was just slowly and lightly chipping away at the acrylic from the back side. You may notice that the hole is not a clean cut hole, that is okay. The rough edges will be covered by your mounting hardware. Every so often I took the front part of my standoff screws and tried to thread it through the hole from the front side. Once I was able to screw that in from the front, the hole was finished.

* Before I started drilling from the bottom

* During drilling from the bottom

* Checking to make sure the stand off screw fits from the front

* Notice the rough edges on this finished hole
Repeat this process on each corner of your wall calendar. I think I spent about 10-15 minutes on each hole. Slow and steady wins the race.
Step 4: Prepare Vinyl Decal
Once your holes are done, it's time to apply your decal! I got mine from Etsy and was very pleased with how it turned out. The shop owner was amazing to work with. I chose to go with a mirror image calendar design so that it will be applied to the back side of my acrylic wall calendar, leaving me with a smooth writing surface for my dry erase markers. The decal came with very clear instructions on how to apply it in case you are not as familiar with the process.
Upon opening your decal you will want to use a card or flat edge (I used my ruler) to go over it a few times. You want to make sure the vinyl is completely stuck to the transfer tape.

Step 5: Tape Decal Into Place
At this point it is time to remove the protective sheet from the BACK side of your acrylic wall calendar.
Your acrylic sheet should be clean at this point, but make sure that there is nothing on it and center your vinyl decal from the edges of your calendar. Once you have it where you want, make sure that the decal is transferred side up (it will be marked) and take a piece of tape down the center of the decal to hold it in place.

Step 6: Peel Backing Away From Decal
Start working from the left half of your decal. Carefully peel the sheets apart making sure that the vinyl is sticking to the top sheet.

* Be sure not the crease your decal when pulling it back

Step 7: Cut Away Excess Backing
Take scissors and carefully cut away the backing on the left side. It does not have to be a perfect cut, just be sure not to scratch your acrylic wall calendar with your scissors.

Step 8: Apply Decal To You Calendar
Once the backing is out of your way, gently lay the transfer side back down onto your calendar. Be careful to not pull and stretch the decal. After you have it lightly placed you will not be able to pull it back up.
Step 9: Smooth The Transfer Paper
Take your flat edge and run it across your newly stuck decal, working from the center out making sure that there are no air bubbles and the vinyl is firmly stuck to the acrylic.

Once it is stuck, remove the center tape and repeat steps 6-9 for the right side of your calendar and any other decal you need to apply, like the notes section decal.


Step 10: Peel Transfer Paper Off Acrylic Calendar
After you have the entire thing placed and firmly stuck, gently peel away the transfer sheet to reveal your decal.

Step 11: Mark Holes For Mounting Hardware
For easy hanging I chose to hold my acrylic wall calendar up to the wall up where I planned to mount it and marked the holes on the wall.

Step 12: Pre-Drill Holes In Wall
After tracing the circles onto the wall, I marked the center of them and then used a laser level to double check that the dots lined up. Then I pre-drilled holes where the stand off hardware will be going. The bit you use for pre-drilling should be smaller than your screws.
Step 13: Hang The Base Hardware
Once you have your holes pre-drilled, place the screw into the base so that it pokes out the back. This way you can line it up with the hole you already made on the wall. Use your screw driver to then finish securing the base into place.

I personally did not use the anchors that the hardware came with. The plexiglass sheet that I am using is thin and not very heavy, so I did not feel that it was needed. If you want to be on the safe side 0r are using a thicker sheet to create your calendar then you may need to insert your anchors prior to this step.
Step 14: Hang Your Acrylic Calendar
The next step is to hold your acrylic wall calendar up to the base hardware and start threading the front of the hardware through the holes you made and into the base. I found it helpful to have an extra set of hands for this.

* Because of a mistake I made which I address further down in this post I actually hung the sheet after getting the top hardware up so that I could triple check the placement of my bottom holes.

* Doing it this way is not necessary if your holes are all in line
Step 15: Remove The Protective Sheet From The Calendar
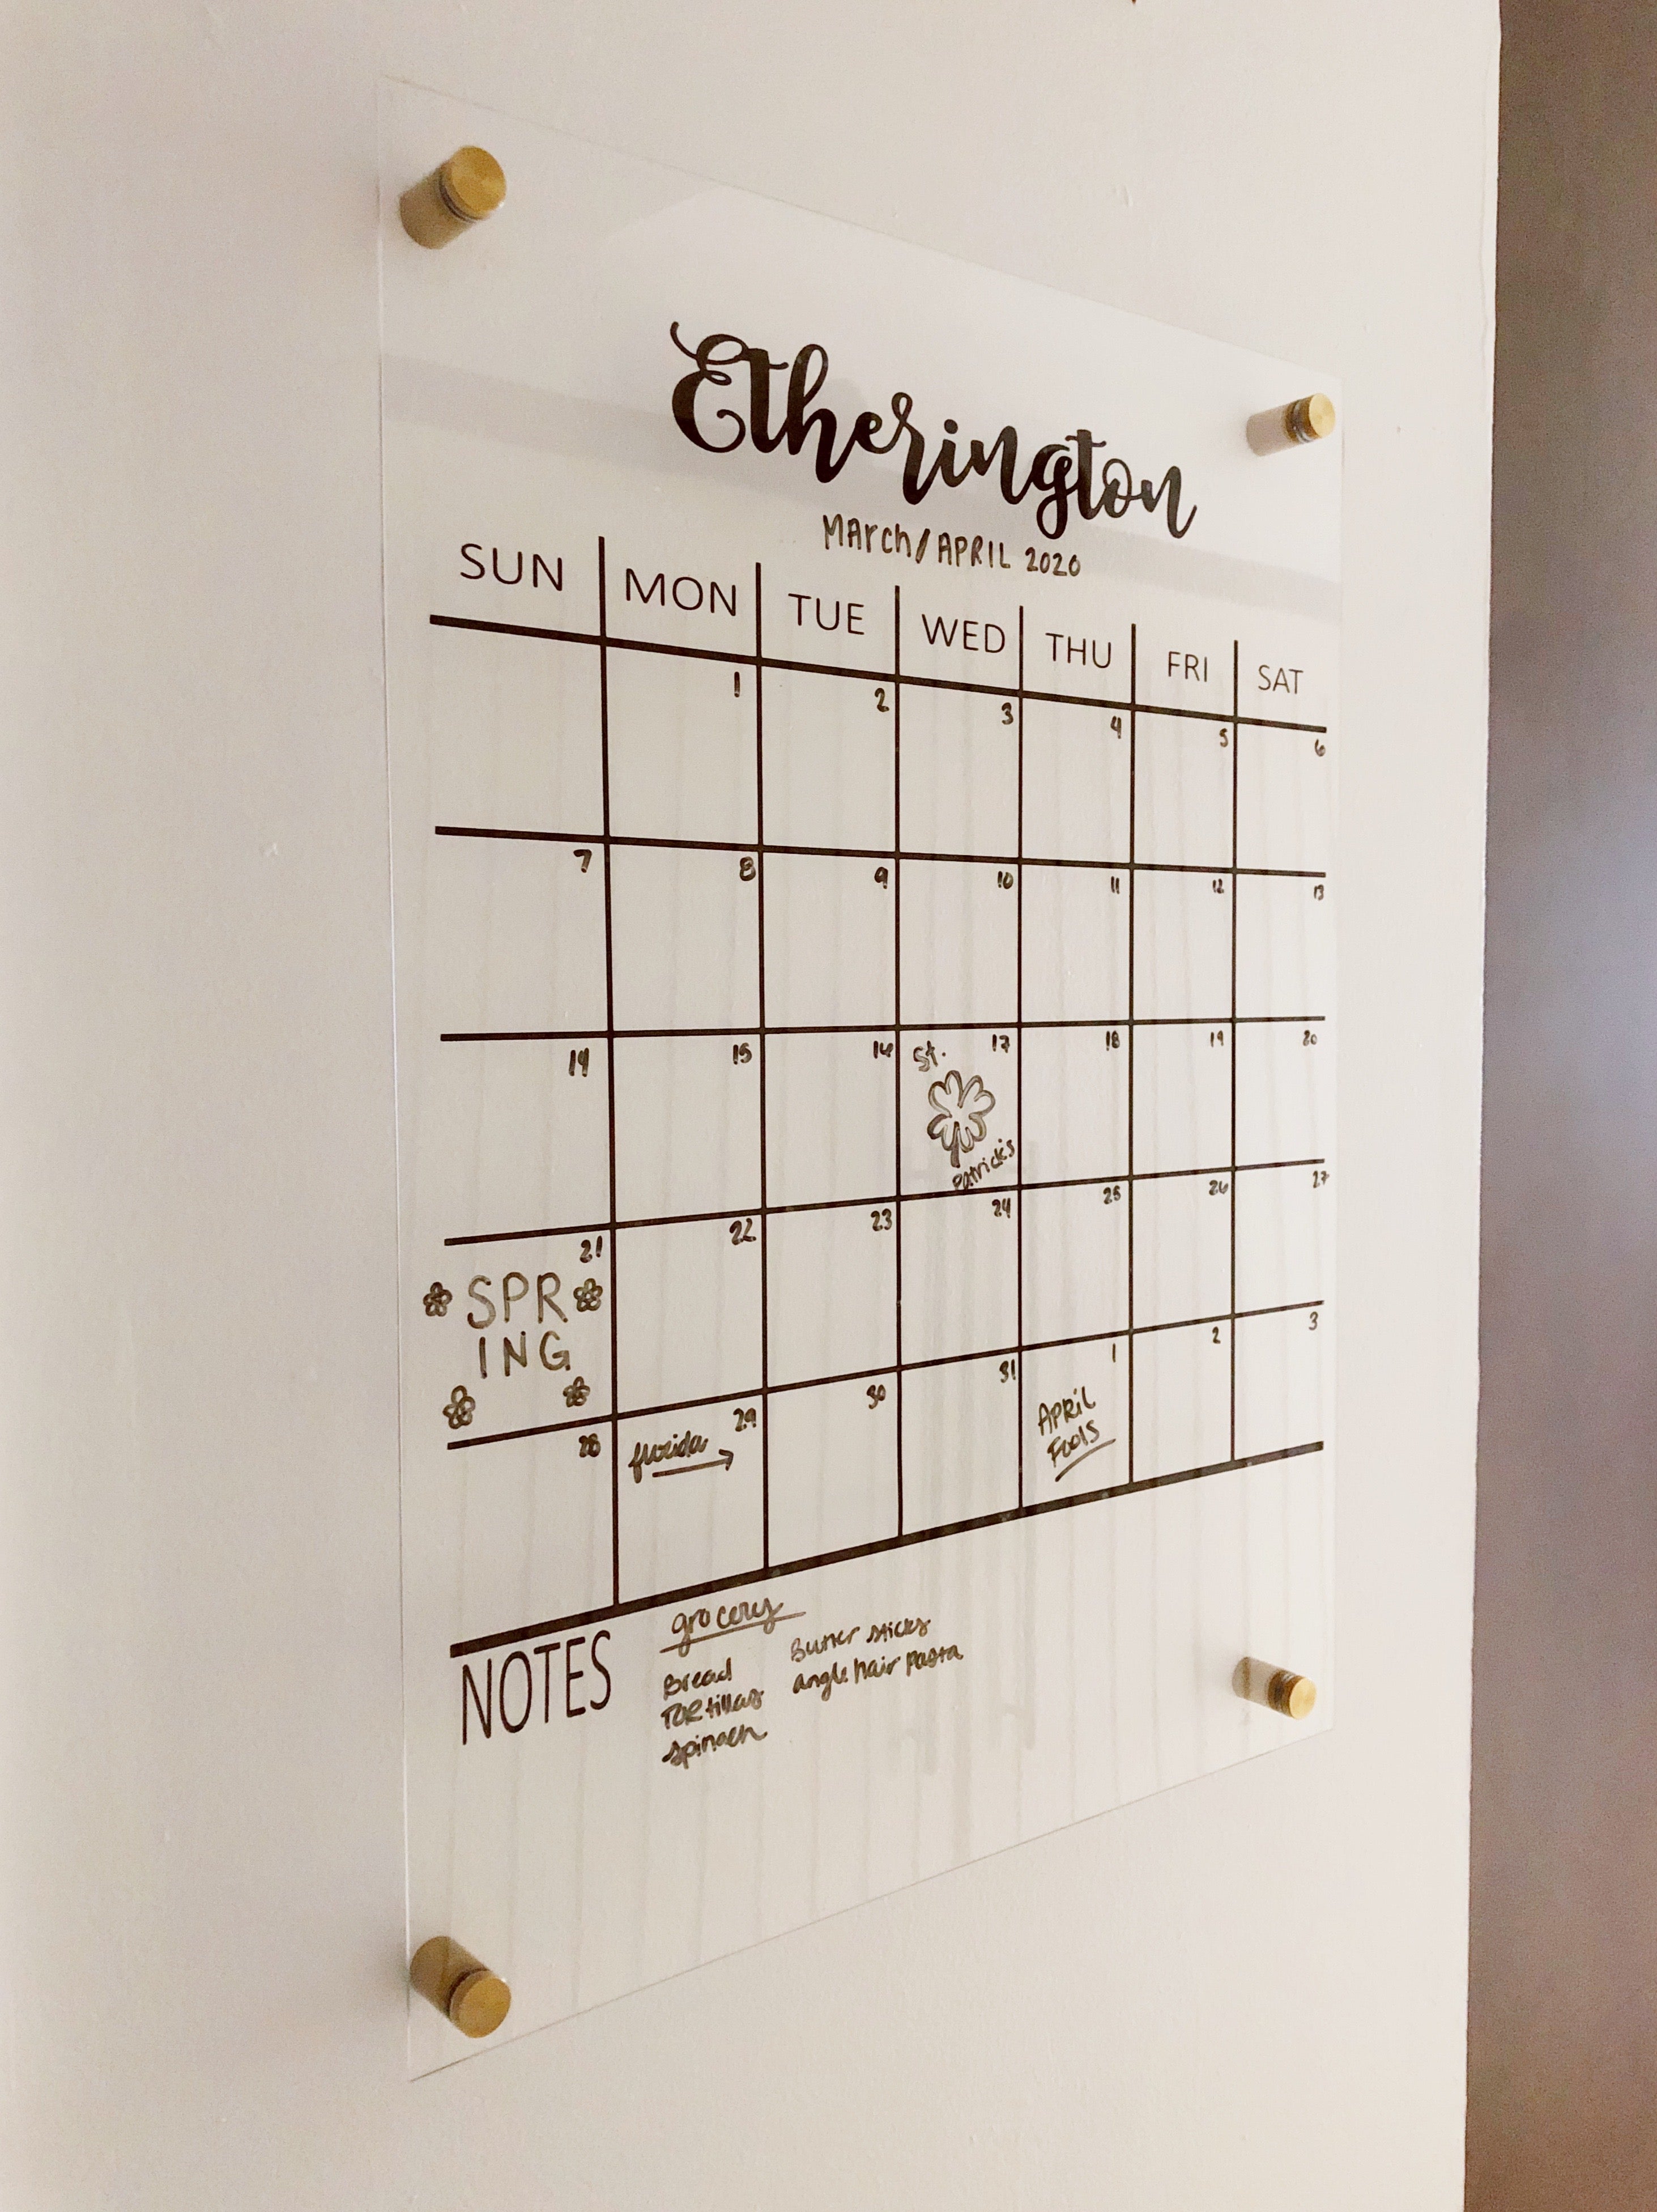
Finally your acrylic calendar is finished and hung up! Remove the protective sheet off the front and enjoy your finished product.

Total cost for me was $43, on average supplies for a calendar this size would cost between $50-$60
We hung this in our hallway across from our pantry to be used as a mini command station since we do not have a home office. I think I will be adding a wall sconce above it using the magic light trick to finish styling this little wall. If you are using this as a desk calendar it would look awesome with some hanging baskets beside it and a few modern desk accessories. I think the overall look of a big wall calendar is so much nicer than a small paper one.
There are many different ways you can customize this as well. You can change the color of the mounting hardware, the color of the vinyl, or the font used for the decal to suit your home décor style. If you're putting it on a darker colored wall you could even opt for a frosted glass sheet instead of the clear.
My Mistakes
Even though I am happy with how this turned out, it did not turn out "perfect". I made a mistake when drilling my holes, which caused one of my corners to be out of line with the rest.
I realize now that what caused my hole to be out of line is the fact that I did not have my drill bit centered over the dot I had marked for placement. That can be a difficult task with such a large drill bit.
Here are ways you can prevent this same mistake:
- Use a smaller drill bit (like the 1/8" I listed above) to drill into your acrylic calendar first. You can be more precise with the smaller bit and that hole will serve as a center for you to rest the larger 1/2" drill bit on. If I ever needed to drill into plexiglass again this is what I would do.
- Use a step drill bit, like this one, to make your holes.
- Use a glass drill bit, like this one.
It just depends on what you have on hand and what you are willing to invest in for this project.
What do you think? Will you give this project a try?
You might also like:
- The Easiest Indoor Vine Plants
- How to Make a Mood Board For Your Interior Design Project
- An Indoor Herb Garden Anyone Can Start
- How To Make Your Place a Live/Work/Thrive Sanctuary
- How to Make Your Bed Even Better
- How to Easily Hang Curtains, According to a Pro
- How to Mix and Match Throw Pillows, According To A Pro
- Natural Ways to Bring More Light Into Your Room
- 5 Houseplants That Do More Than Look Pretty
- 7 Must Have Wall Desks for Working at Home
- 8 Easy Interior Design Tips for Small Spaces


 TOP
TOP